Posting later than hoped but been productive before the family invasion and time to make a record before I forget.
Card
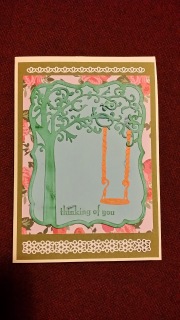
A couple of my friends have started coming round to “come and play” with my crafty stash, which is wonderful as it gives me a good excuse to play myself. Even if just to show off how to do certain effects. Mostly made little toppers while friends are here and come up with more ideas of things I want to do, but actually realised I could make my creation while showing off. so made a card using a spellbinders die I had picked up as part of a bigger bundle before Christmas. It has come out pretty well considering I was just playing about with a few ideas.
With the girls
A while back through the dangerous idea ground that is Pinterest I came across this post http://www.whiletheysnooze.blogspot.co.uk/2013/01/diy-herringbone-metallic-artwork-easy.html
making a simple but effective canvas art for this bloggers new house. My interest in it was a project could get the kids involved in for the more exciting parts.
So gave the girls a small canvas to paint. I offered them a range of colours and let them (…well mostly R) pick what colours to use. I didn’t get too involved only to try and make sure they tried to paint in one main direction. Sorry but with a 1 year old and a 4 year old I was not brave enough to try and take pictures during the paining process, (also probably should have move downstairs to the none carpeted area before doing this part of the project).
Next I started adding low take tape in some sort of diagonal pattern across the canvass.
A lot of credit has to be given to Sarah the original blogger as I found covering just this small canvas a bit of a trial. especially without doing any pre-measuring I found it frustrating when bits would not join up as much as I would have hoped.
If you look closely you may see where some bits of tape have been subtly extended.
As well as starting the project with the kids, acrylic paints up in the carpeted studio space, I also chose a bad time of year to want to go outside (even for 10 minutes) to spray paint the canvas at this point. After my first hopeful attempt when the sun was shining and it started to hail just as I had set up my space, I was at least prepared with everything to hand for the next sunny spell.
Thankfully giving just enough time for it to have the recommened 2 hours drying time (indoors after 10 minutes) so that R and E could help me remove the tape to reveal our master piece.
The girls enjoyed taking all the tape off, although E did get distracted for most of the time as sticking tape to her belly was more interesting that taking it off the canvas.
And too the final product with added tear created by the last 2 out of 4 pieces. Typical!
Create a dramatics focus I suppose.
R was very proud of it.
Baby memory box
I was somewhat over excited about becoming an Aunty. for some reason it seems just as amazing as being a mum but without all the hard work. And no, I am still sure I do not want any more children. With everyone and baby Yvee coming over for 2nd Christmas last week I wanted to make a little memory box for all those little things Jon and Abi are going to keep with Yvee. I came across the idea in one of my Craft Beautiful magazines a few months ago so adapted that to a little chest of drawers a had found.
I am actually quite happy with how it came out.
Although I would have liked to have a little more time to add a bit more detail, but didn’t dare keep hold of it for fear of what might happen in the post.
………………………………….
That is enough for one post.
A good start to a crafty new year.
Another project in process, hopefully will be a post for Up cycling soon


Recent Comments